How to Clear NVMe SSD Cache Windows 11:
Table of Contents
NVMe (Non-Volatile Memory express) M.2 SSDs have revolutionized storage performance, offering speeds that dwarf traditional SATA-based drives. However, even the fastest silicon is susceptible to performance degradation over time.
If you notice your NVMe drive’s sequential write speeds dropping significantly during large file transfers, or if your system feels less responsive when saving heavy software compilations, the culprit is likely a saturated internal storage cache.
A common technical limitation of TLC (Triple-Level Cell) or QLC (Quad-Level Cell) NAND flash is that while read speeds remain high, write speeds are much slower natively. Manufacturers bypass this restriction by over-provisioning a segment of high-speed SLC (Single-Level Cell) NAND as a dynamic write cache. When this high-speed cache fills up completely during intense workloads, the drive is forced to write directly to the slower TLC/QLC NAND, causing dramatic performance drops.
This comprehensive guide breaks down precisely how to clear nvme ssd cache windows 11 configurations safely using built-in system tools and official management suites, forcing the drive to dump its temporary data pools and restore factory performance levels.
Pre-Requisite: Data Safety Disclaimer
Clearing an NVMe drive’s cache is safe. The procedures outlined in this guide force the storage controller to reorganize data and execute maintenance commands. Unlike a secure erase or factory reset, clearing the write cache does not delete your personal files, operating system, or installed programs. It only flushes temporary operational data.
Method 1: Force a Manual TRIM Command via PowerShell
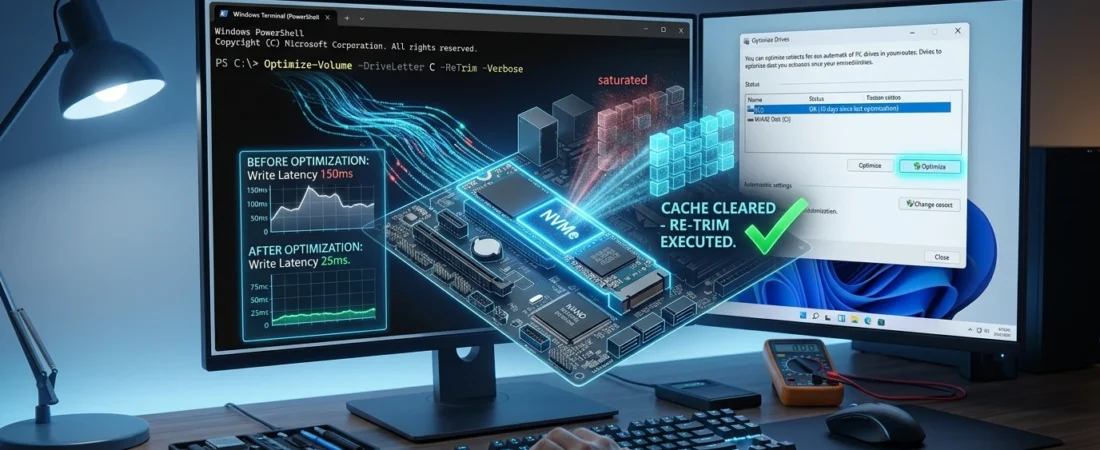
Modern operating systems execute a TRIM command (or Deallocate command in NVMe specifications) automatically, telling the SSD which data blocks are no longer considered in use (e.g., deleted files) and can be internally wiped. However, Windows doesn’t always execute this command immediately after a heavy workload. Manually forcing a TRIM command is the most effective way to flush a saturated write cache immediately.
Step-by-Step Instructions:
- Right-click the Start button and select Terminal (Admin) or Windows PowerShell (Admin). Click Yes on the User Account Control (UAC) prompt.
- Verify that TRIM is active on your system. Run the following command:
fsutil behavior query DisableDeleteNotify- If the result is
DisableDeleteNotify = 0, TRIM is enabled (Safe). - If the result is
DisableDeleteNotify = 1, TRIM is disabled. Runfsutil behavior set DisableDeleteNotify 0to enable it before proceeding.
- If the result is
- Once confirmed, run the manual optimization command for your C: drive (where Windows 11 is typically installed):
Optimize-Volume -DriveLetter C -ReTrim -Verbose - PowerShell will execute the command immediately, displaying a confirmation message when the TRIM pass is complete. For modern drives, this process is nearly instantaneous. This forces the storage controller to organize its blocks and release the dynamic cache.
Method 2: Optimize Drives via Windows 11 GUI
If you prefer a graphical user interface (GUI), Windows 11 integrates the TRIM command into its standard “Optimize Drives” utility. This tool accesses the same underlying PowerShell command structure.
Step-by-Step Instructions:
- Open the Start menu, search for “Defragment and Optimize Drives,” and launch the application. (Alternatively, navigate to Settings > System > Storage > Advanced Storage Settings > Drive Optimization).
- The optimization interface will appear, listing all attached drives. Windows 11 should correctly identify your NVMe drive as a Solid state drive.
- Select your NVMe storage volume (typically C:).
- Click the Optimize button.
- Windows will execute the ReTrim command on the SSD, instantly updating the status to “OK (0 days since last optimization).”
Method 3: Manufacturer Storage Management Suites
The integrated Windows TRIM commands address standard operating system deallocation. However, many NVMe manufacturers over-provision their drives and manage the specific cache logic using proprietary storage controllers that Windows cannot directly access.
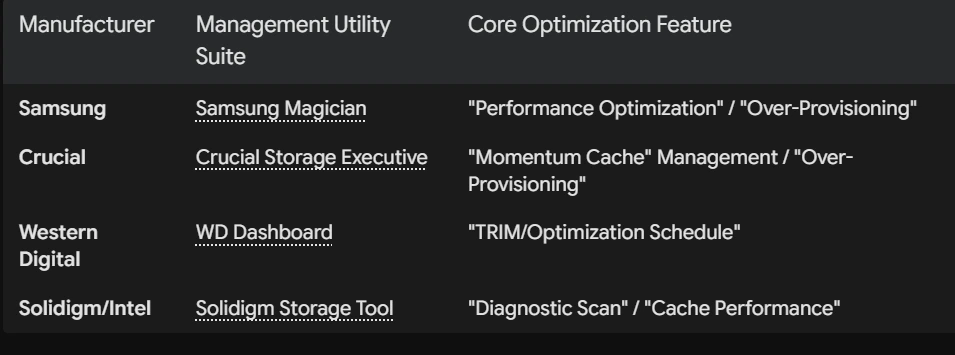
For maximum performance restoration, you should utilize the official manufacturer-specific utility designed for your specific NAND architecture. These utilities can access internal SMART data that Windows misses and offer “performance optimization” passes that specifically target clearing the write cache.
Step-by-Step Instructions:
- Download and install the correct management utility for your drive manufacturer from the official repository links provided above.
- Launch the utility. It will automatically detect your compatible NVMe drive.
- Locate the “Performance” or “Optimization” tab. This often has a dedicated section for manually triggering an optimization pass or configuring Over-Provisioning. Over-provisioning manually sets aside a percentage of free space specifically for the SSD controller to use as its high-speed SLC cache, preventing performance drops even when the main volume is nearly full.
| Metric | Target Goal | Maintenance Requirement |
| Active Drive TRIM | Enabled (Notify=0) | Set via PowerShell or standard Windows tools |
| Write Cache Flushing | Immediate | Execute manual Optimize-Volume TRIM command |
| NAND Architecture | Optimal Management | Install Manufacturer Management Suite |
| Drive Longevity | Over-Provisioning | Configure 7-10% of total space in management suite |
By methodically addressing cache deallocation using the system-level TRIM command and utilizing proprietary manufacturer utilities to manage the specific NAND hardware architecture, you can effectively clear the saturated temporary write pools. Integrating these simple manual checks as part of your bi-annual PC maintenance routine is critical to guaranteeing your NVMe drive maintains its advertised peak performance levels on Windows 11 well into 2026.
Official Microsoft PowerShell Documentation: Optimize-Volume cmdlet
This official repository details the granular syntax for PowerShell storage cmdlets, including how the -ReTrim parameter interacts with modern NVMe storage protocols.
Official Samsung Magician Performance Optimization Guide This technical video tutorial from Samsung demonstrates how their software utility manages internal cache deallocation and provides steps for configuring over-provisioning to improve sustained write performance.
Some Other GeekMatrex Posts:
Stress Test: How to Check PC Hardware Stability with Free Software 2026
Apps for Computer: Top 10 Must-Have PC Software Programs for 2026